Log In
To log in to your website:
- Click the Log In link in the top left of the page, or add “/admin” at the end of your site’s URL and hit enter/return.
- From the next page, click the button labeled “Use my School ID” to sign in using your University of Arizona NetID.
Add a Page
- From your site’s dashboard, select Pages in the left hand menu.
- Select the button labeled Add New at the top of the page.
Edit a Page
- From your site’s dashboard, click on Pages from the left sidebar menu.
- Hovering your cursor over the name of a page in the page list with reveal a number of options, from these select Edit.
- The editing environment is the WordPress block editor, also known as the Gutenberg editor, which you can use to design high-quality pages and posts. Below are some helpful videos to get you started.
Overview of The Block Editor
Introduction to the block editor
This video introduces you to how to add different types of blocks such as a paragraph block, gallery block, heading block, list block and table block as well as move blocks around to write a post.
Add Images
You can add an image to a post or page using an image block if you are using the block editor. Other options for adding images using the block editor include:
- Cover block – Allows you to add text and cover overlay to your cover image to create sections in your articles in a more visually appealing way rather than using heading text.
- Gallery block – for creating image galleries.
- Media & Text block – Used to place image, or video, side by side with text.
To add an image block you click on the + icon at the right of any empty block or at the top left of the editor then search for image and click on the image block icon.

Add Image
Once you have added the image block, you click on Upload or Media Library to add your image.
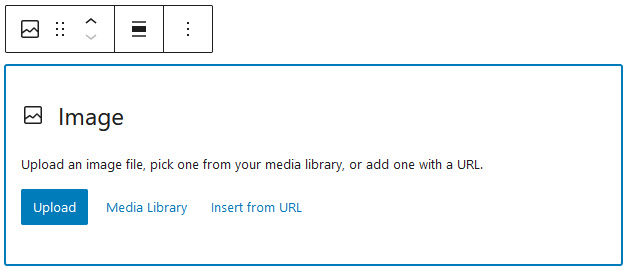
Click on Upload or Media Library to add your image. Or click on Insert from URL if you want to link to the location of an image on the Internet.
You can add the caption (optional) once the image is inserted.
For more detailed instructions on adding images, view the Image Block Documentation on Campus Press.
Add Documents
Besides inserting images, video and audio files you can also add other file formats such as documents, PDF and PowerPoint directly into your posts and pages.
This inserts as link to the file. When readers click on the link it either opens up in another web browser or downloads the file onto their computer.
You add documents, PDF and PowerPoints to a post or page using a file block.

The file block has two options:
- Upload: upload a new file from your computer.
- Media Library: select a file that is already uploaded to your site’s media library.

Once the file has been uploaded or you’ve selected the file you want to use from your media library it is added with the title of your file and a download link.

The title of the file and the download link text can both be changed by clicking on the text and editing.
Create a Custom Menu
Most themes support custom menus which makes it easy to change the links displayed at the top of your site.
Here is how to create a custom menu to display in your primary menu location:
1. Go to Appearance > Menus

2. Add your menu name such as Main Menu and click ‘Create Menu‘

3. Select the pages you want to add to your menu and then click Add to Menu.

You can also add links to posts, categories, tags.
Custom links allows you to add a link to another website.
To add a custom link you add the URL where you want to take someone when they click on it, add Link Text to specify what the tab will say, and then click Add to Menu.

4. Drag and drop the items you’ve added to the menu structure to change their order in your menu.

Any menu item that is indented under another item will appear as a sub-menu under that the parent. In the following menu the Resume page is indented underneath the About me page. The Resume will load in the drop down menu under About me when a site visitor hovers their cursor over About me.

5. Select the display location for your menu and then click Save Menu.

For more on adding and customizing menus on your site, visit the Campus Press Menu Documentation page.
Add Users and Assign Roles
Go to Users > Add New.

Your Faculty Sites website is set up to use SSO (Single Sign On) so you can add new users to your website using their University of Arizona NetID.
Add the email address attached to their existing username, select their user role (listed below) and click Add Existing User.

Your new user is automatically added to Users > All Users and they log into the account using their existing username/password. They need to use the lost password link if they can’t remember their password.
User Roles
The five roles you can assign users on a blog are: Administrator; Editor; Author; Contributor; and Subscriber.
Consider carefully what role you assign other users since administrators are able to remove other users, including you, and editors can delete content.
WORDPRESS USER ROLES
The five roles a user can be assigned in decreasing level of responsibility are:
- Administrator – can do everything including complete power over posts, pages, plugins, comments, choice of themes, imports, settings, assign user roles and are even able to delete the blog.
- Editor – is able to publish posts/pages, manage posts/pages, upload files, moderate comments as well as manage other people’s posts/pages.
- Author – can upload files plus write and publish own posts.
- Contributor – can write own posts but can’t publish them; instead they are submitted for review. An administrator or editor then reviews and publishes their posts.
- Subscriber – can read comments and write comments.
For a more tutorials and documentation, or to request support, visit